Ok, no real bacon in this one. Sorry. When we left off, we were starting to place the siding on the exterior.
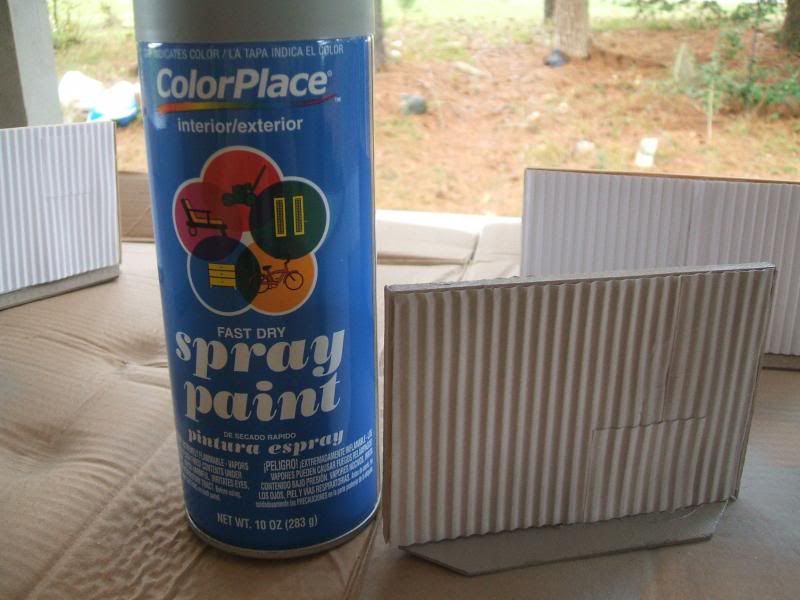
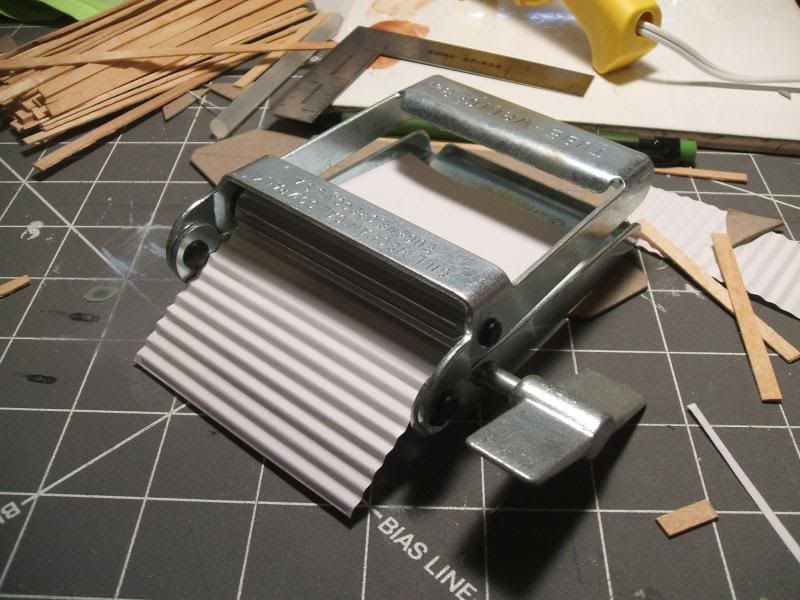
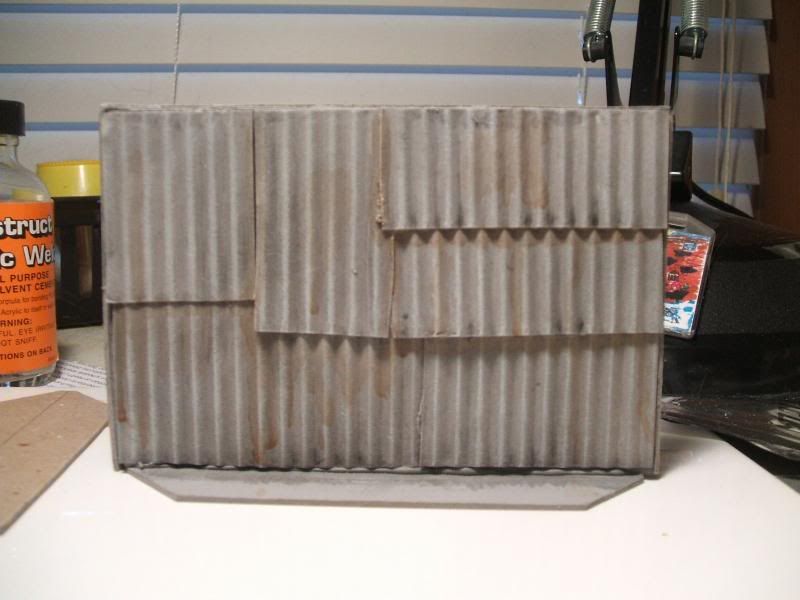
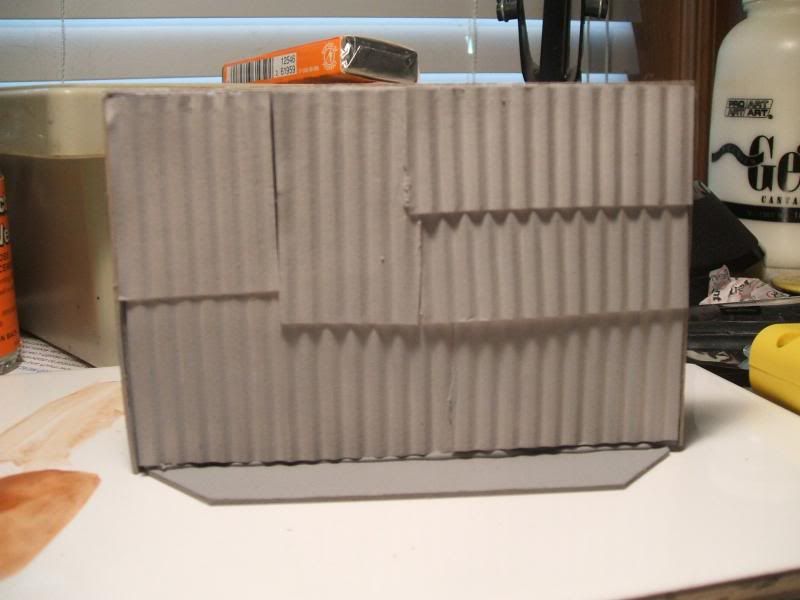
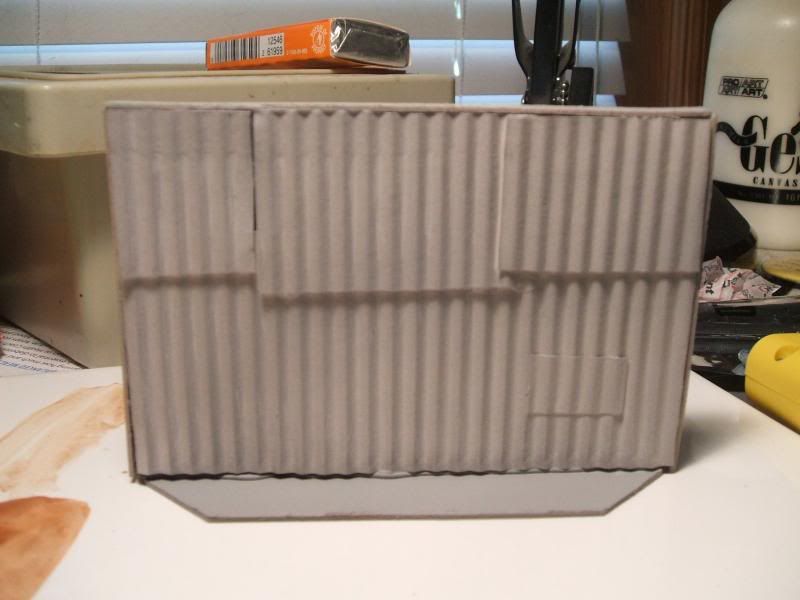
In this case, I used a new (to me) product in place of my usual Plastruct or Evergreen sheets. The JTT sheets come two to a bag and are much lower priced...something that made a huge difference the day I went to the train shop. This was about half the price of the other brands, so I celebrated the savings by picking up some roofing material at the same time. Since this is a simple home, some basic clapboard siding was chosen. You could just as easily use brick or whatever else strikes your fancy. Remember Bob Ross.
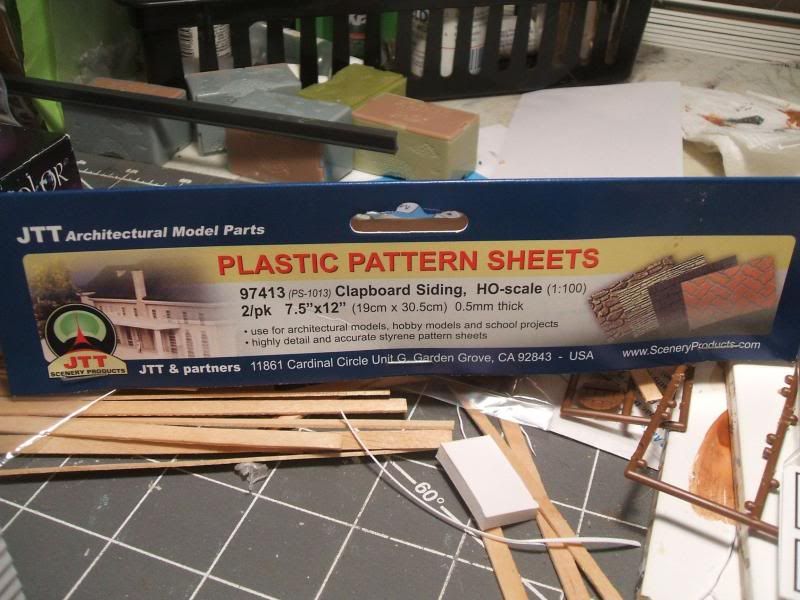
Note that this says HO scale, but I am working on an O scale project. Remember what I said about "looking right"? In this case I just liked the size of the boards better than the actual O scale sheets.
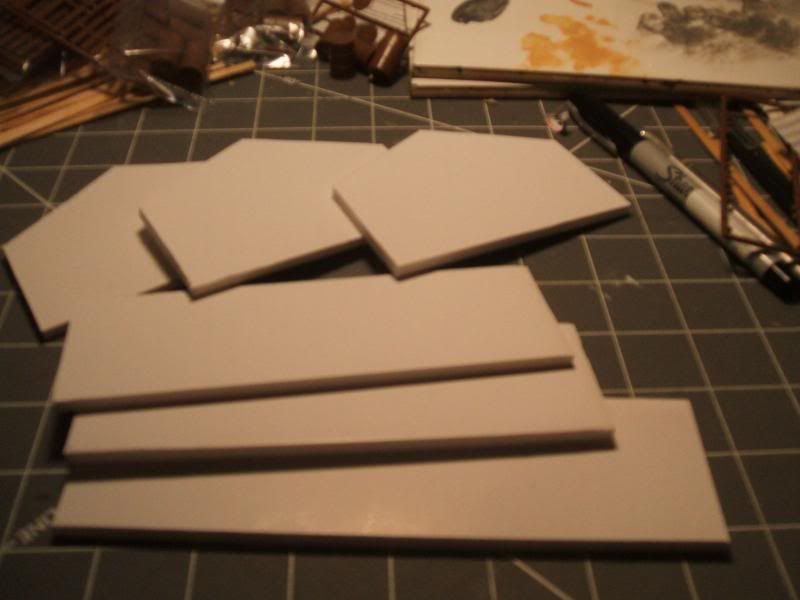
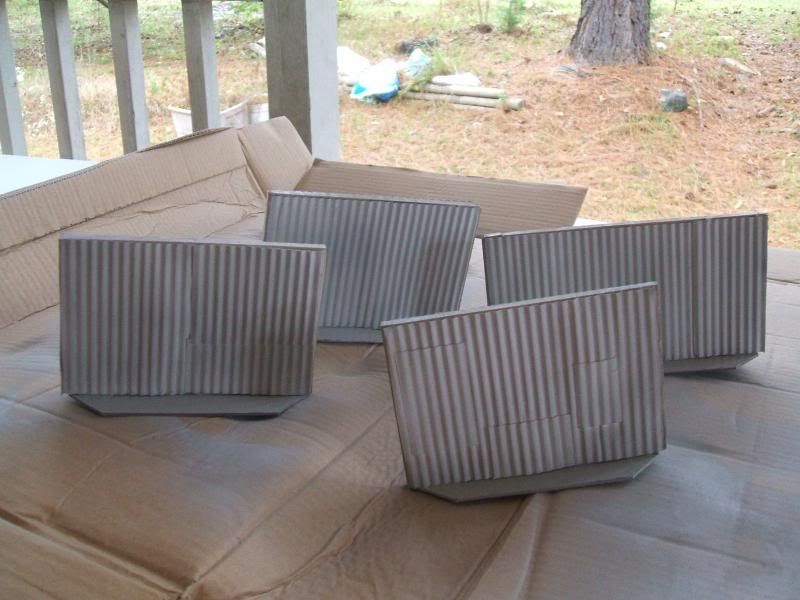
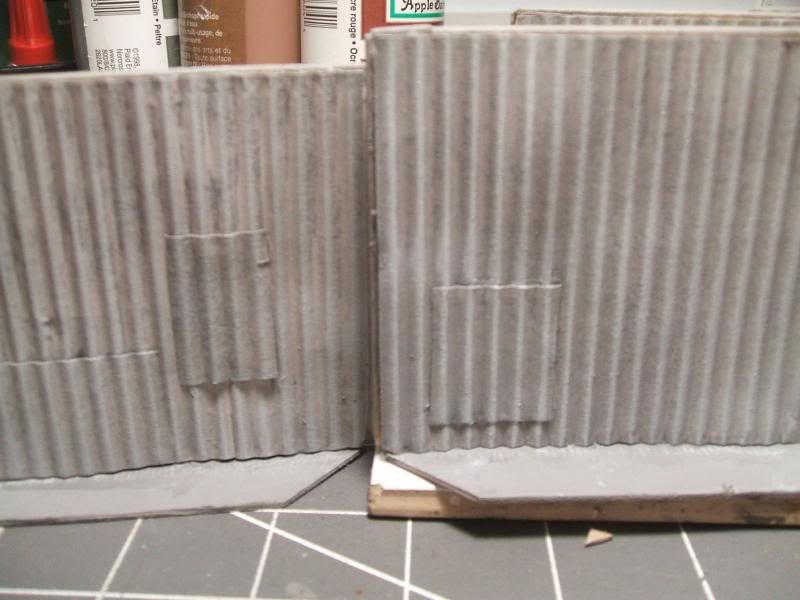
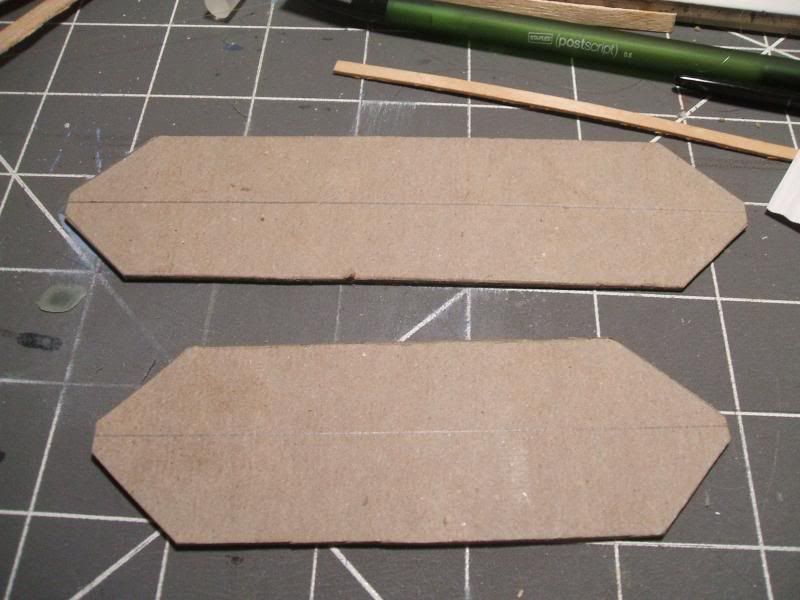
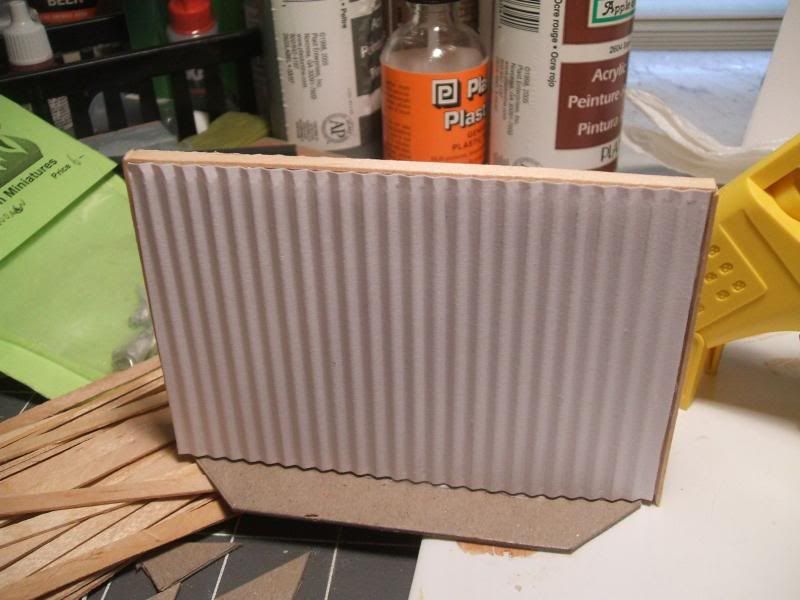
I started by cutting out the sections I would need, along with the door and window openings. These were traced on the backside of the sheet and carefully cut out with a (sharp) hobby knife.
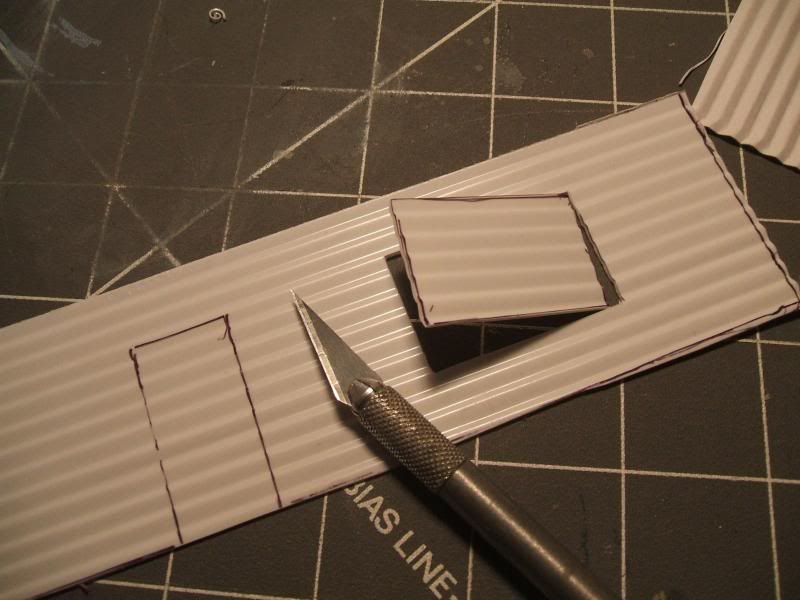
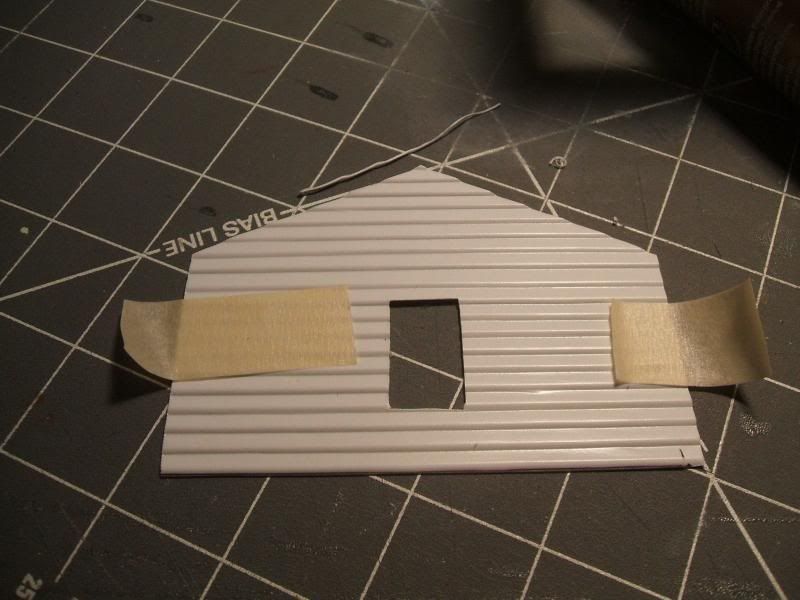
**IMPORTANT** These sheets have a definite directionality. Make sure you have the piece correctly oriented before you start cutting. You may not notice that the siding is upside down now but I bet it will be rather obvious once you put some paint on it later. The tape is on this piece so that its one less thing to fiddle with during application.
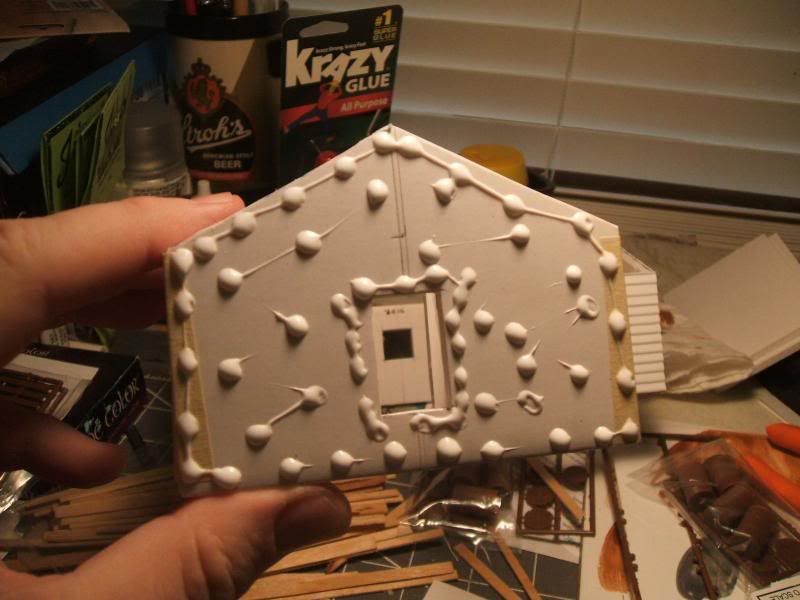
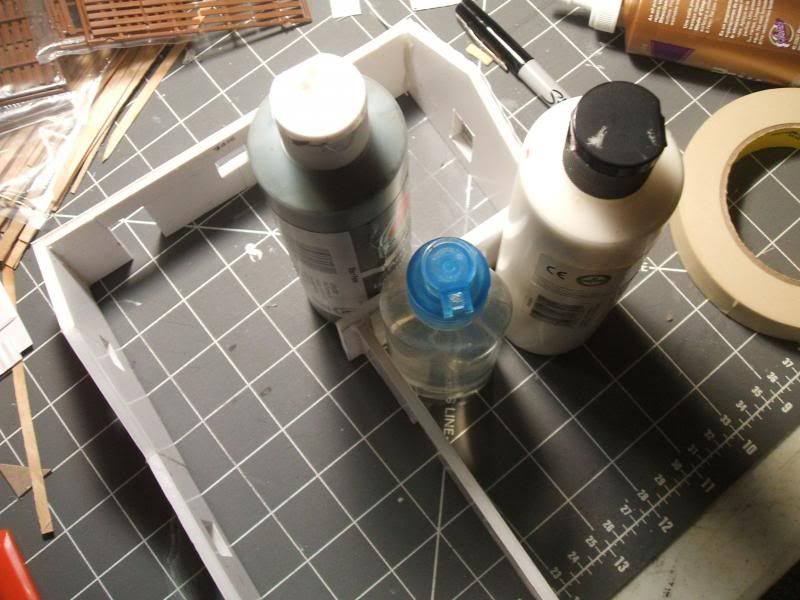
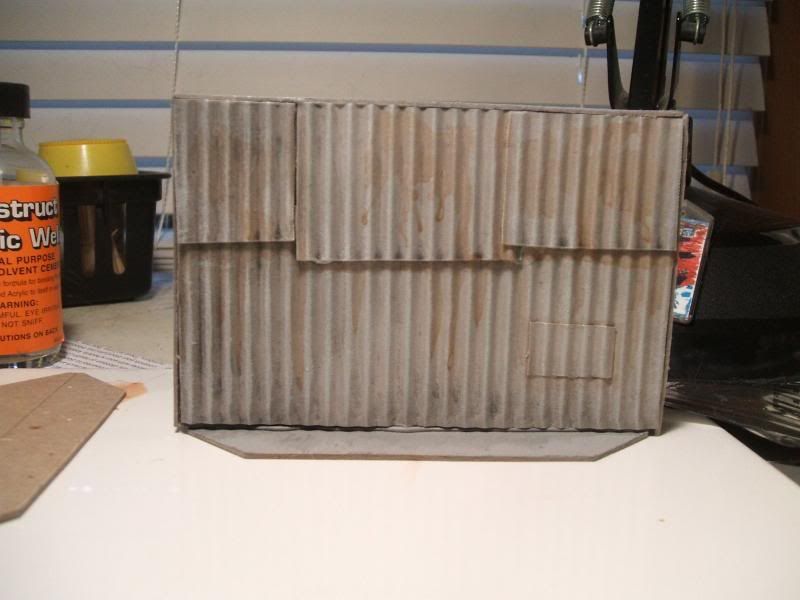
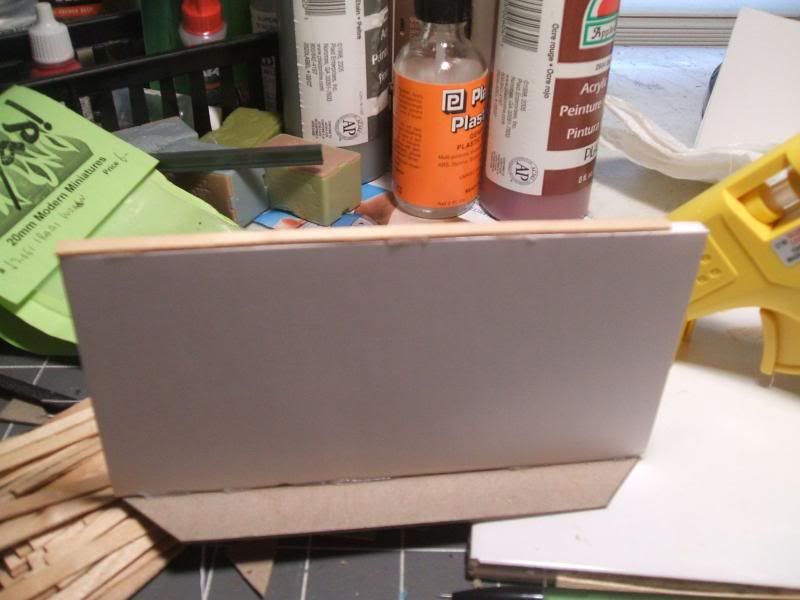
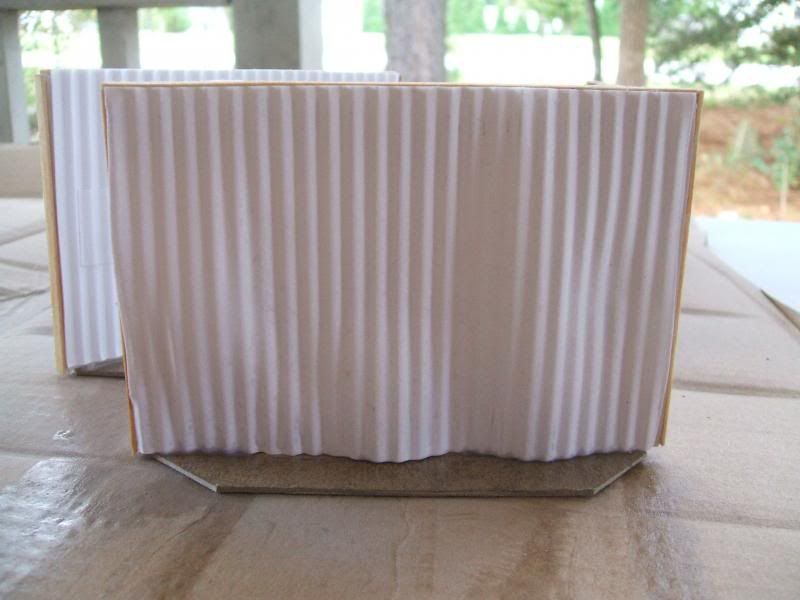
The pva/white glue was put on as shown, then spread out so that is a thin coating. You only want it thick enough to form a good bond with the siding. Too much and it will warp the foamcore. Make sure you have a good bead of glue around any window and door openings, along with all outer edges of the wall. This will help ensure that a good strong bond and lessen the chances that you will catch the siding on something and cause it to separate from the foamcore.
Once you have it positioned where you want it, gently tape it into position until it dries well. Today that has taken about an hour, but your mileage may vary. At this point you can also apply the white glue to any exposed edges of the foamcore to prevent damage from the spray primer later on. But if you want to take a little extra time to fancy it up a bit...
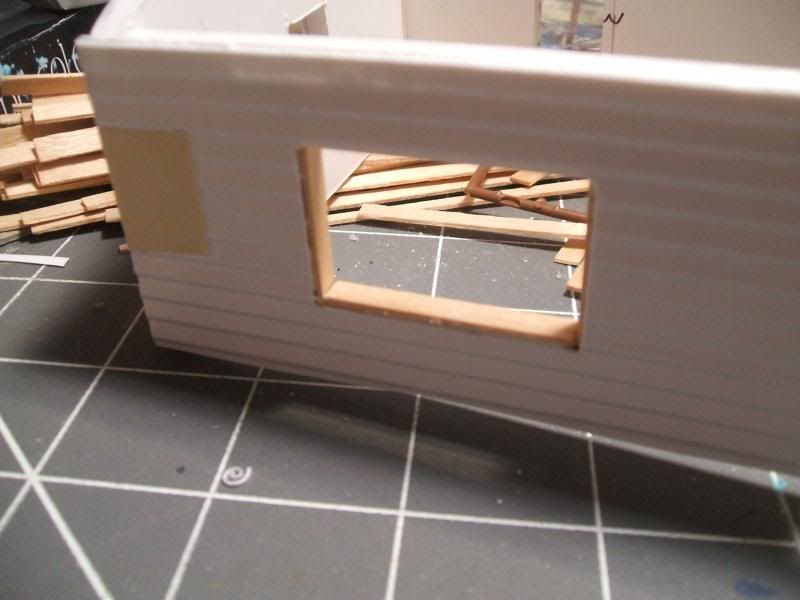
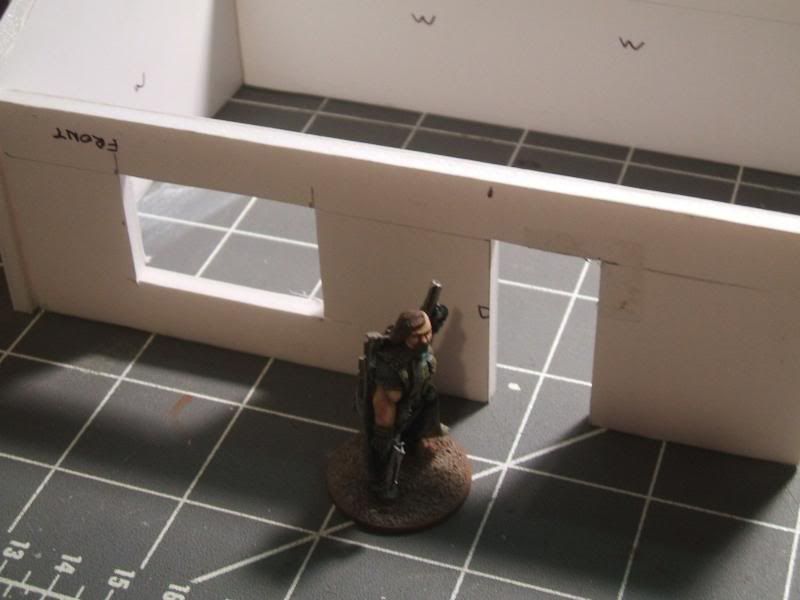
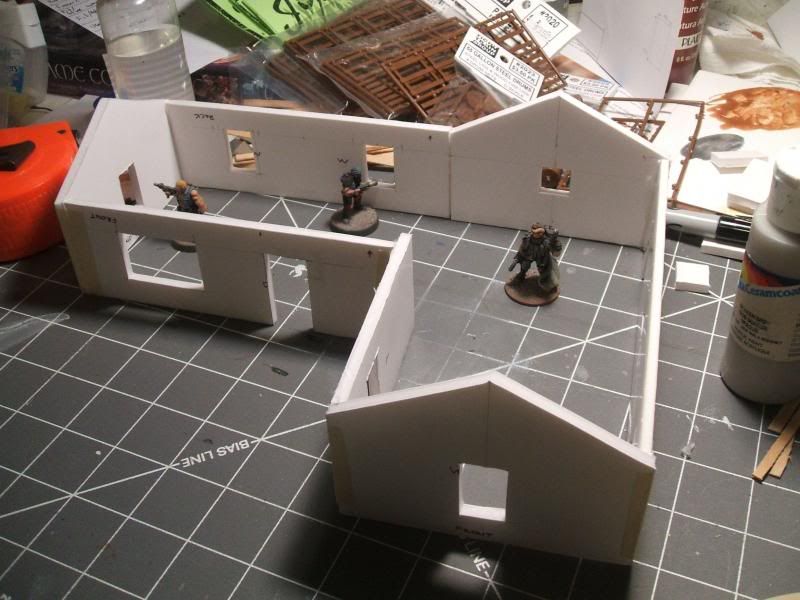
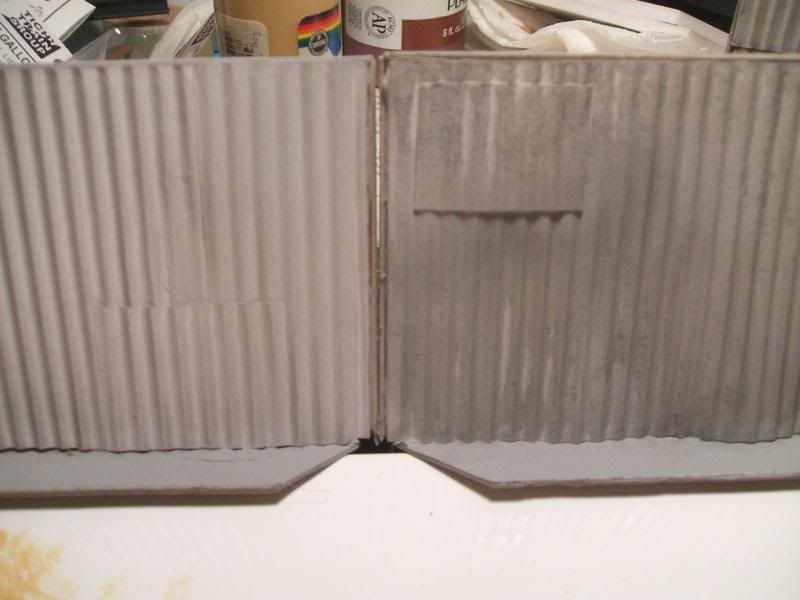
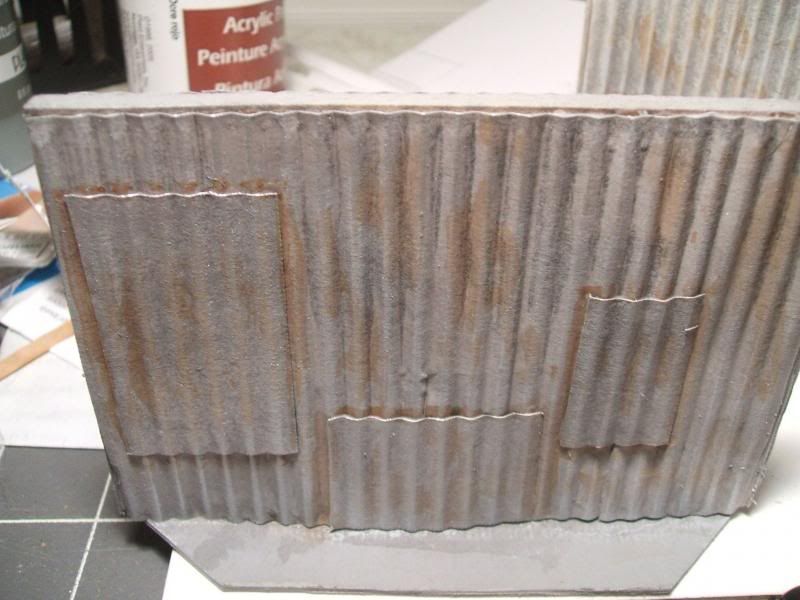
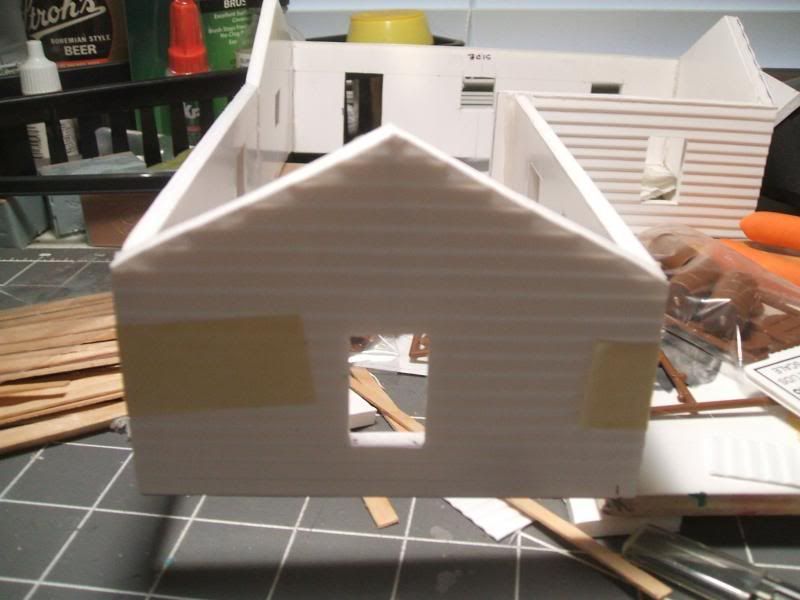
Add some wood or plastic strips to the framing of all windows and doors. Yes, it takes a bit of time but unless you are in an extreme hurry the effort is worth it. This really defines the openings as windows and doors instead of just a hole in the wall.
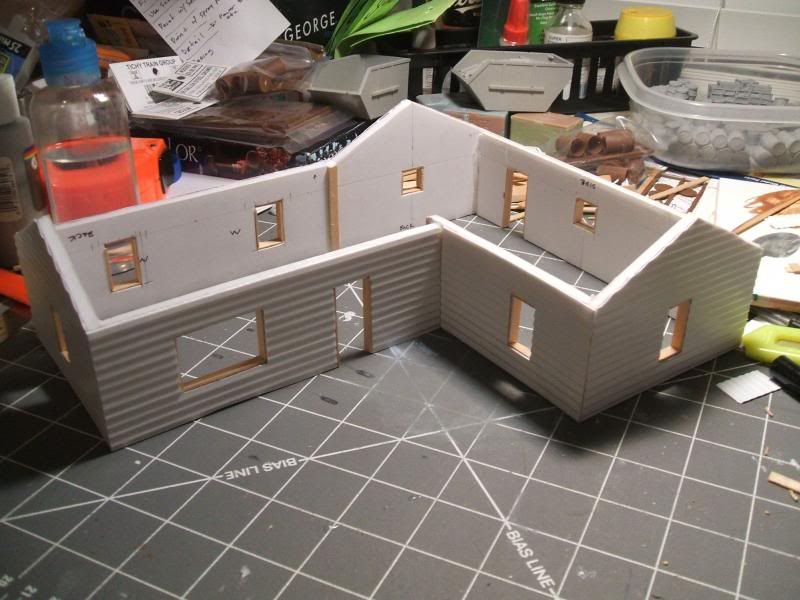
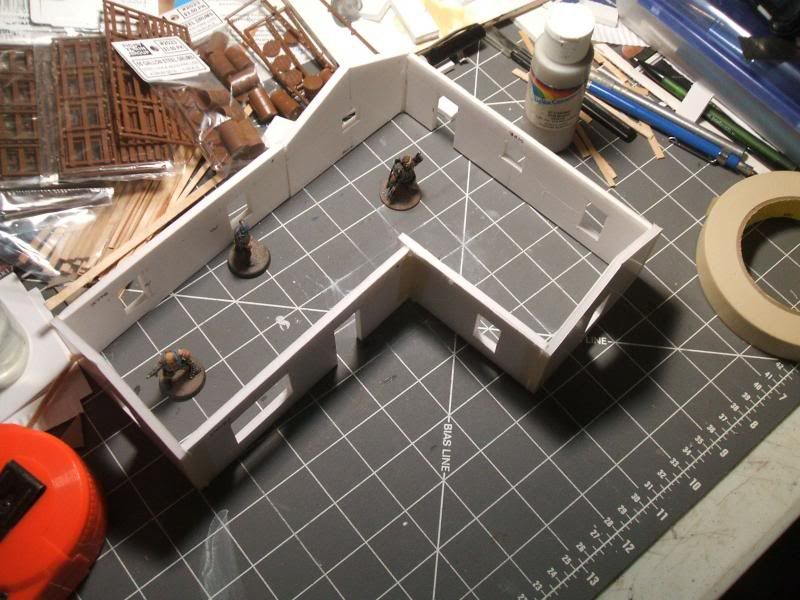
It is also useful for covering up unsightly joins on the interior walls. Next up - installing a floor. That will do double duty as both a place to put a rug and as a means to help strengthen the structure.
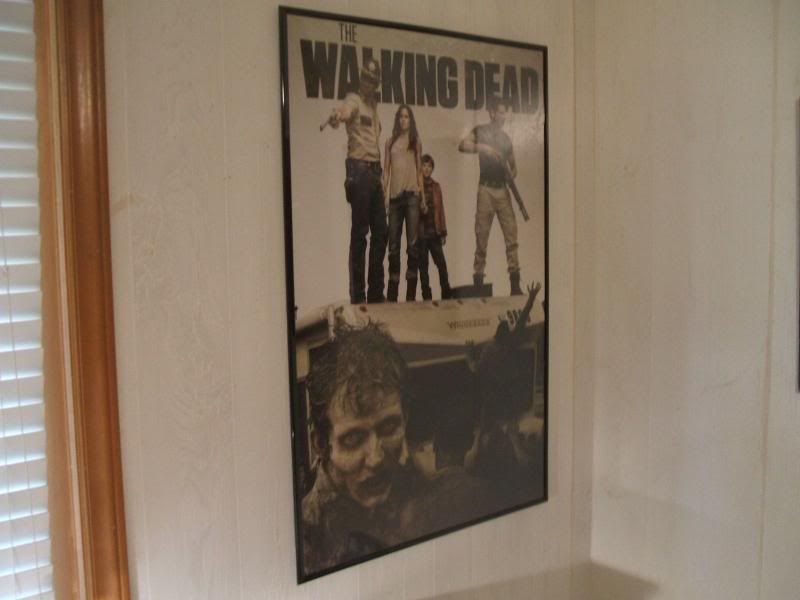
Sort of related - finally got a proper frame and hung up this inspirational poster that my daughter got me a while back. A bit of art always brightens a dark corner. Even in an apocalypse.
Tuesday, October 22, 2013
The first house on the block.
Finally got around to working on the first of many buildings that will become VF. Started with something fairly basic, a small L-shaped ranch style house.
Wall sections cut out. Or at least some of them. I originally was planning a rectangular shaped house, but once I test fit the pieces it was apparent that it wasn't really house sized. More like a large shed. So I cut out more sections to make something a bit more roomy.
The techniques were basic. Figure out the size of your walls and cut them out. Calculate the appropriate height and width of your doors and windows, and mark out your locations. Cut some out and test against one of the figures who will be using the building. Beyond all other arguments/concepts/theories/formulas about scale the biggest things is "Does it look right?".
I could make an example of the (mostly) 20mm vehicles sold by a certain company alongside their range of 25mm infantry (that didn't mix well with anyone else's) and how obviously incorrect they looked together. And I could point out how silly it was that said company engaged in damage control of the criticism by pointing out how dumb their customers were, because "the math is right". This being the same outfit that said that the pre-painted figures done by machine were "better than what the majority of people game with"...but Im not going to have that rant about that certain company. The one that pissed away their opportunity with Starship Troopers. Or their modern combat game. Or any of their other miniatures projects that some of us actually enjoyed and were angry when they withered on the vine because they made fun games and we liked their stuff. **cough cough Mongoose cough* So, the takeaway is - make your stuff look right and I guarantee that nobody will play in your games, stop to make measurements and calculations and pompously announce "the math is wrong!".
Though if someone does, just throw their dice out the window and see how they like THAT math.
Here is basic carcass of the house with all windows and doors cut out, walls joined with hot glue and buttressed with a small bit of masking tape. Some of the locals have come to compare calculations using tape measures and slide rules. The outer walls will be covered with siding so the tape won't be seen. You could also use pva/white glue and pins to join the walls, but I cannot find my pins - dressmakers pins are the best for this, they have a large "T" shaped head, much easier to remove when the glue is dry. So hot glue and tape it is.
Another overhead shot to show how roomy it is. That living room. And the natural light! Too bad you'll probably have to board over most of the windows. And place sandbags in the firing positions. But a pit of paint and some nicknacks and it'll be so homey you'll never want to leave. Until your supply of tinned soup runs out. And then the dog food. And *gasp* the peaches. Not the peaches! *quietly sobs*
Ahem. Here is a sot of a section of siding glued in place and braced with whatever was handy. More to come as I glue it all in place.
Thursday, October 17, 2013
Wall Painting - A quick and dirty tutorial.
So, we have built wall sections, and now they need to be painted. Here is how I did it.
Cheap spray paint for primer. In my case, some $1.00 flat grey from the local big box store. Its cheap, it works, and if there is a problem with it I can return it for another can with pretty much no hassle. Compared to any of the expensive boutique/hobby sprays its no question which to buy, IMO
Once you have sprayed a few light, even coats on all faces of the wall section, let them dry thoroughly. With flat paint this will not take more than a half-hour, generally.
Now the sections are grey, but in my case, very light grey. And very flat. To make them look a bit more "real", we'll give them a black wash to define some shadows. There are many ways to create a black wash. My preferred method is to mix up a bit of black acrylic craft paint with a suitable amount of "Magic Wash". If you don't already have some Magic Wash, its easy to make using a 50:50 mix of water and Future acrylic floor polish. I make it without pigment so that I can mix it with whatever colour I need to make an appropriate wash. But use whatever wash works for you. If, after it dries, you find it still too light for your desired result, apply another wash. Compare the sections in the pic below. On the left is the freshly primed section, on the right is a section after an application of black wash. I ended up applying it again to further darken it up (as well as hit all those spots I missed!).
After the sections have reached your desired level of dark greyness, make a 50:50 mix of medium grey and white or just use a very light grey. Apply a heavy drybrush to the high edges of the corrugations to really make the edges pop. At this point you can use a sandy tan colour to dry brush the wood bits, this will pick up the grain and really accentuate the weathered wood look.
Now to further dirty up the "metal" parts of the sections, mix up a brown wash. A brown with a bit of a reddish cast works best to bring out a rusty effect. Apply in blotches and also along all edges of plates or sheet edges. As you apply it, quickly wipe off any that covers the high points/light grey highlights to keep the contrast between the high and low areas. I just swipe my finger across it, but a paper towel works too if you are more inclined to be neat.
You could just call it good at this point, but if you are so inclined you can also add a final highlight to the "metal" bits - a drybrushing with silver. This will really make the edges of any "repairs" pop.
All thats left is to finish the basing. But thats for another day.
A trip to the train store...
Yesterday I made the trek to one of the few places remaining in my area to buy model railroad bits, mainly to buy some suitable siding and shingle materials for what will be the first residence in Valhalla Falls. I say "mainly" because I always skulk around the entire shop in an effort to discover what treasures may be inside that I previously had no idea I needed.
This is just such a discovery. Now, being a confirmed follower of the 20mm cult, I normally wouldn't hang out over in the O gauge section. These may be really old news to some, but they are new to me. These are from Tichy Train Group right here in North Carolina. They also have a load of other bits in various scales that may be useful to minis gamers. www.tichytraingroup.com
They go together very quickly with a little Plastruct cement. And they look great.
I primed them grey, and once dry, heavily drybushed them with a sandy tan colour. You can see the progression even with my slightly washed-out photo below.
Quick to assemble, quick to paint. Affordable. Whats not to like? I'll post some pics of the barrels when I get around to actually painting them.
Wednesday, October 16, 2013
Walls - A basic construction tutorial.
This tutorial assumes some basic familiarity with the materials used and the basic techniques needed. If you have specific questions feel free to ask. This a very "Bob Ross" style tutorial. It is really set of suggestions that you can follow or not as you see fit. Hopefully it will at least give you some useful ideas.
I began by cutting the bases out of cardboard. Use whatever materials you prefer, I used this particular cardboard because it: (a) is easy to cut with EMT scissors, (b) a fairly durable weight (think tablet backing or similar), and (c) it was free.
They are lozenge shaped so that the base will not interfere if you need to set up two straight sections as a corner, or if you would want to make a 3 or 4 way intersection of walls.
Next I cut out the foamcore wall sections for each base. I allow a slight overhang on each end, to further clear any intersecting bases. Use a SHARP blade for this, and don't try to cut all the way through in one pass. Make each cut with three separate strokes. Cut through the outer paper layer, then cut through the inner foam, then finally through the paper layer on the underside. If you start to drag or pull out small bits of foam or paper, get a new blade. Using a hot glue gun I affix the foamcore to the base, and then affix a section of wood coffee stirrer to the three exposed edges of the foamcore. I use a low-temp glue gun as I always end up getting glue on my fingers - having burned myself with the high-temp stuff once I learned it sometimes pays to not use something similar to napalm as a glue. Note that the wood framing is optional - you could easily cover the exposed foam with pva/white glue and just paint over it. Or you can use whatever other material you might like instead.
After your basic wall section is attached, and framed in, attach your corrugated card sections. Below is the tool I used to create them.
A 3"x5" card fits almost perfectly, a bit of experimenting will show you the best way to guide the card through. This one is a "Tube Wringer" made by the Gill Mechanical Company, Eugene OR. Its original purpose was for wringing tubes of paint. It or another like it should be available at any well-stocked art supply store. As I recall it wasn't very expensive.
A basic wall section with a section of card attached will look something like this:
You can apply one section of card, or cut up smaller sections to apply with a bit of pva/white glue for a scruffier patched look. As Bob Ross would tell us, its your world, you make it the way that makes you happy. Bob was a nice guy. We could probably all stand to be more like that. But for those times we encounter people who are just being mean, we have walls. So back to building those. Make sure you apply enough lines of the hot glue to really hold the card down. This becomes important in the next step.
Next I painted a coat of sandable sealer onto the base and the entire corrugated section and wood framing. This is the kind I used, it was $16.00 at the local DIY big box store. Shake or stir it well. It applies easily and cleans up with water.
Apply a very light coat to the corrugated paper, too much and it will encourage warping of the paper itself. This is more evident if one does not glue the corrugated bits down well enough. As I discovered. *Ahem*
If this happens don't worry. If the warping isn't too severe you can just leave it as some sort of damage or shoddy construction. If it is severe (or you don't like the way it looks - remember, its your world!), you can use a hobby knife to cut through the center of the warped bit, gently hold each side open and apply some pva/white glue or superglue or whatever under each side, then hold them back in place until they stay down. Glue a suitably sized scrap corrugated bit over the cut and voila, lemons to lemonade. Thats what eventually happened to the rather warped piece shown above. Bit of minor surgery and its ready for some paint. But that will be our next tutorial. Happy building!
Tuesday, October 15, 2013
The Walls - Part 2
What a difference a splash of paint makes. Bit more colour and some weathering, pretty much done except for the basing. Then the raising of the walls begins.
And a few of the local neighbors stopped by to say hello.
The Walls of Valhalla Falls
I need a lot of walls to surround even a section of town. Before attempting to bang out 20-some-odd linear feet of wall I want to be sure that my construction and painting method is viable. No sense making a dozen feet of the stuff only to figure out that it will, for some reason, warp or fall apart.
The basic methods and materials will be familiar - foamcore, thin cardboard (like a tablet backing), 3"x5" index cards, wood coffee stirrers, pva/white glue, and hot glue. Something new (to me) I used is sandable sealer, which was recommended to me by a fellow madman, err, gamer. Once my entire construction and painting technique is proven I will post step-by-step instructions with pictures. This will include damaged and breached sections in case things become...dynamic...out on the perimeter.
Both sides of the first section. This measures 3" high and approximately 4 5/8" long. The lozenge shaped base is 1 1/2" wide, so very stable. The corrugated pieces are cut from a 3x5" index card that I ran through a tube squeezer for oil paints. The edges of the foamcore are covered by a "plank" of wood coffee stirrer glue on with pva. At this point it has been glued together, sealed with sandable sealer, and hit with a primer coat of grey spray paint. I have tried for a sort of improvised look, not too neat but still sturdy. The painting continues.
The Madness Begins
Recently, while perusing the vendor's wares at a local convention, I purchased the Two Hour Wargames After The Horsemen ruleset. Being a fan of the post-apocalytic genre in all its forms I had been wanting to add it to my pile of rulebooks for some time. After reading through it a bit I think it will work well for the style of games I enjoy. A few tables down I came across the excellent Wargames Factory Apocalypse Survivors box sets. Looking at the sprues and all of the great bits included I immediately purchased some (1 each of the men and women).
Anyone who knows me is all too aware that I normally do pretty much everything in 20mm. One could say I am a fairly hardcore adherent to the belief that 20mm is The One True Scale, but these 28mm figures were so intriguing I decided to use them for a game. Heck, an entire campaign based on a town and its interactions with an increasingly perilous world.
First up - some walls!
Anyone who knows me is all too aware that I normally do pretty much everything in 20mm. One could say I am a fairly hardcore adherent to the belief that 20mm is The One True Scale, but these 28mm figures were so intriguing I decided to use them for a game. Heck, an entire campaign based on a town and its interactions with an increasingly perilous world.
Subscribe to:
Posts (Atom)