...and fruit flies like a banana. So, its about two and half weeks shy of four years since I declared that I was beginning work anew after a previous two year absence. Four years.
In that time, I mostly did no work on anything miniature related. I played almost no miniatures games. It was a dark time to be sure. Last year I started to snap out of it a bit. I bought the starter set for Strontium Dog and was excited about a project again, was ready to paint and build and roll dice and...then I had a fairly major health issue arise. Suddenly I was wondering if I was going to shuffle off this mortal coil and depart for the great beyond. There are certain words that doctors can say that will cause you to change your focus rapidly. My doctor spoke one of those words to me. Minis and gaming and just about everything else was shoved back the rearmost burners for a while. Thankfully all went as well as anyone could have asked. So after a time, I began to think about fun things again.
My Strontium Dog project (such as it was) went off the rails - partly because of the previously mentioned incident, and partly because I was ghosted by someone who said they wanted to play it. It's not the sort of game that appears to lend itself to solo play easily so it went back to the rearmost burner. That was about 80 bucks worth of excitement that never went anywhere. Such is life. At least I am here still to make that observation.
As chance would have it another game came to my attention and as a bonus it fit in with almost everything I had managed to achieve for Valhalla Falls. Fallout had finally come to the table in an officially licensed and supported format. A ruleset, miniatures, terrain, the works. After pondering it for a bit I found a starter set at one of my local shops and picked it up. Since then I have obtained several expansion/faction sets and look forward to future releases. I have also restarted work on my terrain and buildings from way back at the start of this blog.
I have completed several new barricades, scratchbuilt a couple of wasteland shacks, and completed a few of the O scale buildings shown in earlier posts. Thankfully I took pictures of most of it so new posts will be forthcoming detailing how and what and all that sort of thing. While my current focus is on Fallout: Wasteland Warfare I have not given up on my original vision for VF. It is still there and will still eventually hit the table. Stay tuned (I suspect I am shouting into the void again but that's fine). In the meantime I hope you enjoy some adventures in the Wasteland.
Cheers!
Thursday, August 22, 2019

Thursday, September 10, 2015
Two Years Before The Mast
Ok, no actual nautical information....and it hasn't quite been two years....but after a very long hiatus I have returned to blow the dust off and maybe post something having to do with VF. While I am fairly certain that no one remains to see my progress I shall not be deterred.
Recently I attended Historicon and purchased some useful items that will aid greatly in building VF and in the all-important task of eventually creating a memorable game table.
So, here is a post. The various bits and pieces of VF and its denizens beckon to me to begin work again. I welcome their company after a long sojourn into the twilight without them.
Soon, work will begin anew.
Soon.
Recently I attended Historicon and purchased some useful items that will aid greatly in building VF and in the all-important task of eventually creating a memorable game table.
So, here is a post. The various bits and pieces of VF and its denizens beckon to me to begin work again. I welcome their company after a long sojourn into the twilight without them.
Soon, work will begin anew.
Soon.
Friday, December 27, 2013
The House - a Progression
More like a bloody slow progression. Did this bit over Christmas but was too slovenly to post it until now. I have a good mind to complain about the alleged author of this blog and his lack of discipline.
Right then, some pictures.
The flooring is cut from sheets of paper intended for scrapbooking. The red and tan bits have a texture that I hope will pop when I drybrush them.
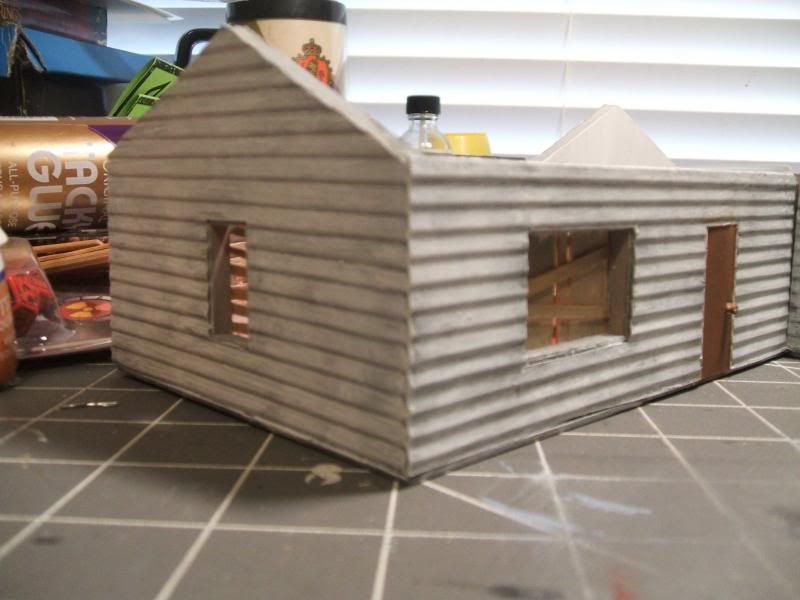
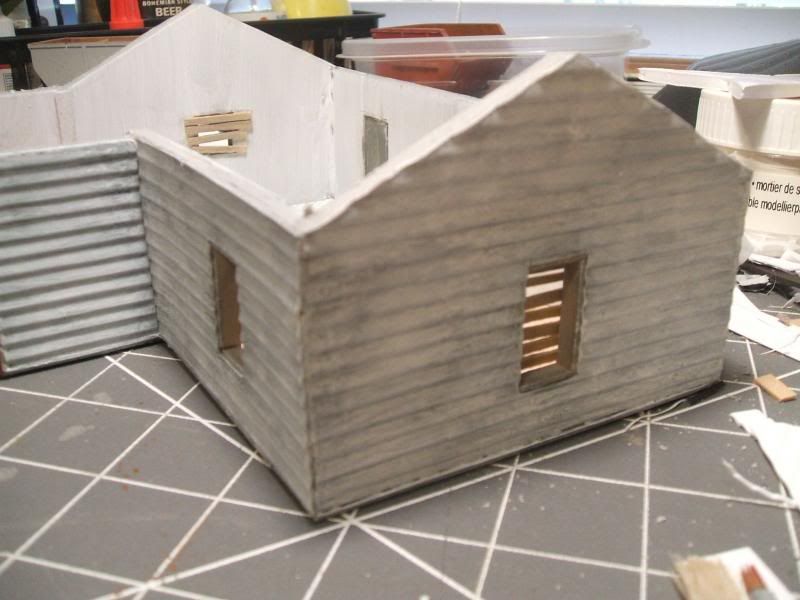
As this is a multi-purpose ruin, I went for the boarded-up window look to give it that Last Man on Earth vibe. No garlic garlands or mirrors, though.
I attempted to use a crackle finish medium to give the white paint a peeling look, but I either did something incorrectly or it has gone bad in the years it has waited to be used since I purchased it. My strong suspicion is the former. In any case I will be experimenting with it some more in the future. I ended up stippling white over the grey primer in varying strengths. It achieved the look I was going for (or at least close enough for now).
Rear view. I was so happy I added a power meter (scratched from plastic tube, balsa, and pva/white glue) then I looked at this picture and realised I did not add a phone or cable box. Have to add that when I finally build the roof. And go back and add all of those to the store. Why? Because I'm just weird that way. I wonder if I can tie them all to a common ground? I wonder why I would even wonder that?

The roof and some other miscellaneous bits will be next. Probably some random furnishings as well. Stay Tuned!
Right then, some pictures.
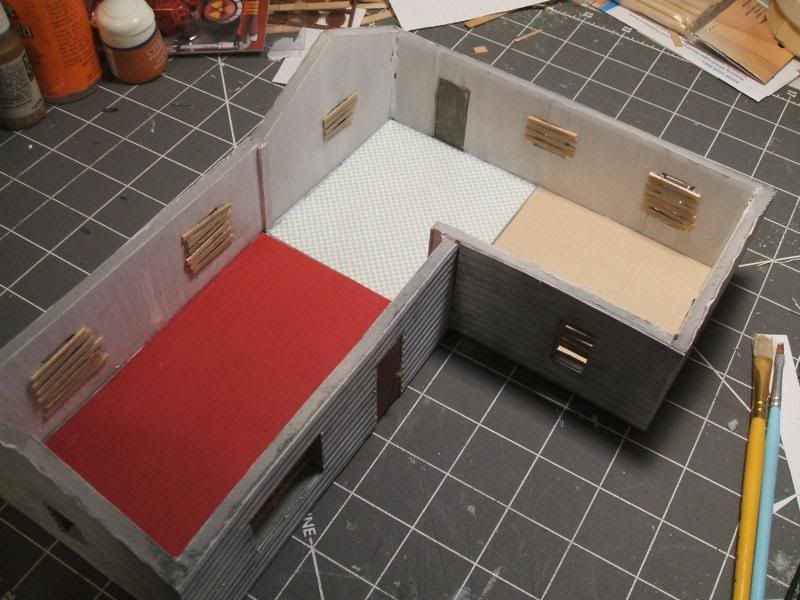 |
| Assorted flooring installed. Still needs to be dirtied up. |
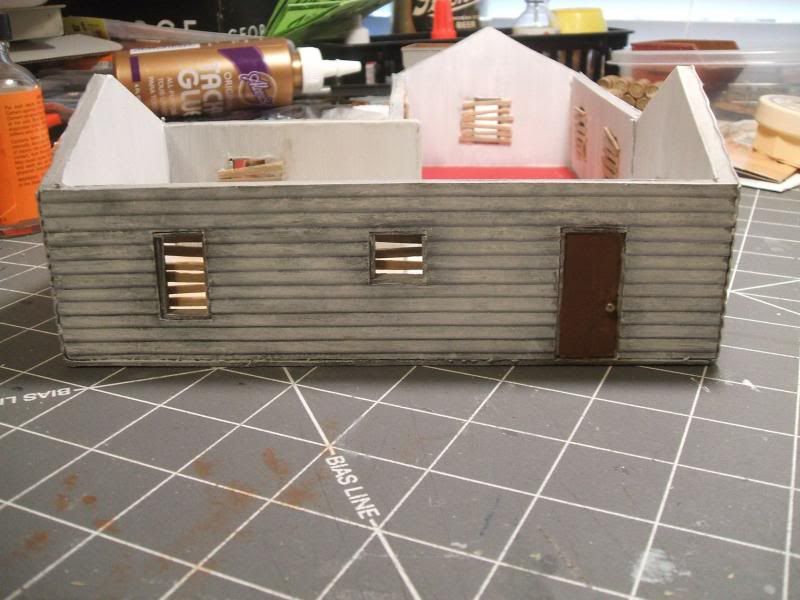 |
| Yeah, yeah, thats great. Where's the roof? |
As this is a multi-purpose ruin, I went for the boarded-up window look to give it that Last Man on Earth vibe. No garlic garlands or mirrors, though.
I attempted to use a crackle finish medium to give the white paint a peeling look, but I either did something incorrectly or it has gone bad in the years it has waited to be used since I purchased it. My strong suspicion is the former. In any case I will be experimenting with it some more in the future. I ended up stippling white over the grey primer in varying strengths. It achieved the look I was going for (or at least close enough for now).
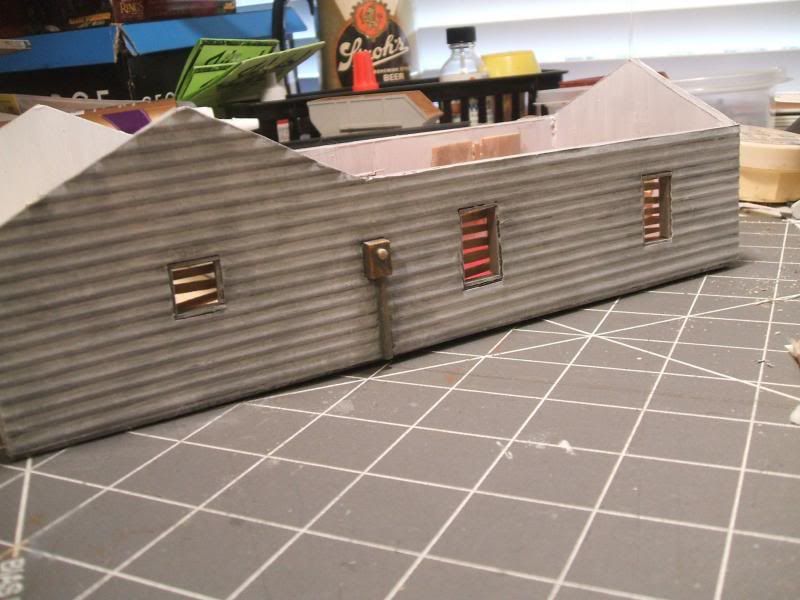 |
| That meter might be difficult to read. |
 |
| Those window treatments are all the rage this year. |
The roof and some other miscellaneous bits will be next. Probably some random furnishings as well. Stay Tuned!
Monday, December 23, 2013
Back to the Front !
Thankfully it didn't take a month to get around to the other side of the building. Started posting some of this on various forums with the end result that it seems a bit less like shouting into the void. So more pics to peruse and inane text to read.
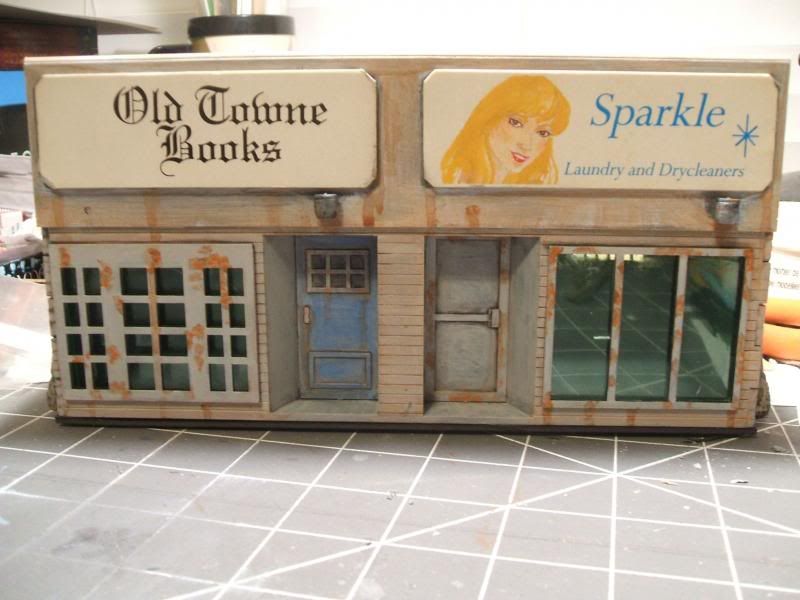
Last time we had painted the very bricky finish on the sides and back, sort of like a mullet if that hairstyle had been made of brick. It would have made people's heads look very 8-bit I would think. In any case the front got it's due turn under the brush to go from a grey plastic model railroad building to a painted post-apocalyptic plastic model railroad building. Without further ado -
A light grey treatment followed by some damp brushing on the wood bits with white, then a copious wash of reddish brown, followed by some dirt and rust. I left the original signage but I will, eventually, craft something different. Perhaps several different sets so that this building can be many things to many people (ok, many things to the few people remaining). Looking at it now it looks too clean but I was afraid of the ink running should I get the signs wet.
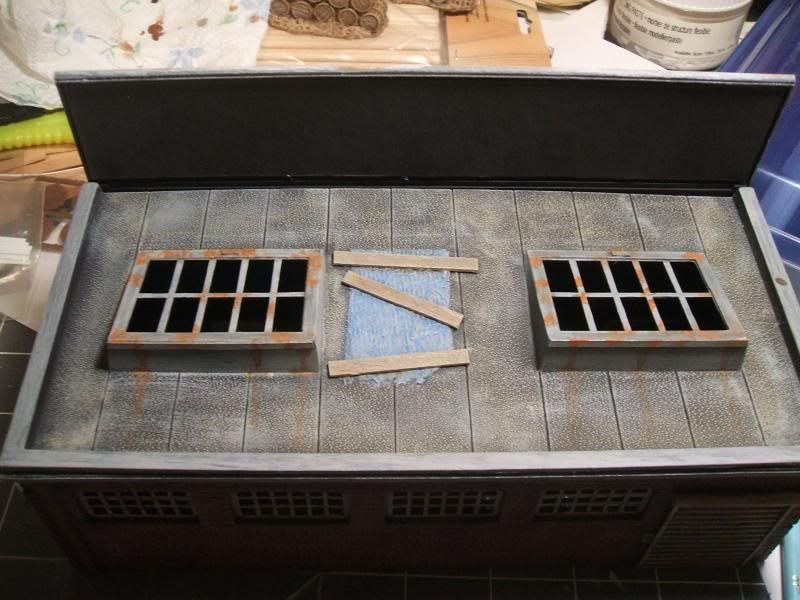
Not to be forgotten, the roof had a repair added and the same type of dirt and rust treatment as the front.
The now-traditional art board floor was glued into place after getting a coat of sandable sealer on both sides and drying about an hour. Not pictured (but use your imagination) - the abandoned house got a coat of gesso on the interior walls to prep them for painting. The outer walls will be my first experiment with peeling/chipping paint (crackle finish). About 10% of what I wanted to get done this weekend but thats 100% more than I usually seem to get done, lately. Stay tuned! And have a Merry Christmas / Holiday Season / Grumbletime.
Last time we had painted the very bricky finish on the sides and back, sort of like a mullet if that hairstyle had been made of brick. It would have made people's heads look very 8-bit I would think. In any case the front got it's due turn under the brush to go from a grey plastic model railroad building to a painted post-apocalyptic plastic model railroad building. Without further ado -
 | |
| Not sure how "sparkley" the laundry is now... |
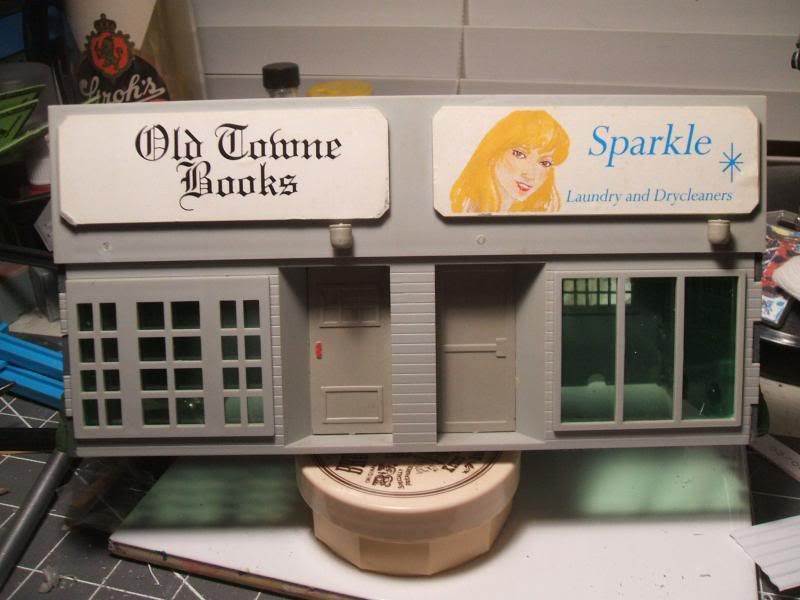 |
| Here is the "before" shot. Life was so much simpler then. |
A light grey treatment followed by some damp brushing on the wood bits with white, then a copious wash of reddish brown, followed by some dirt and rust. I left the original signage but I will, eventually, craft something different. Perhaps several different sets so that this building can be many things to many people (ok, many things to the few people remaining). Looking at it now it looks too clean but I was afraid of the ink running should I get the signs wet.
Not to be forgotten, the roof had a repair added and the same type of dirt and rust treatment as the front.
 |
| Check out the nice neat worksurface. |
The now-traditional art board floor was glued into place after getting a coat of sandable sealer on both sides and drying about an hour. Not pictured (but use your imagination) - the abandoned house got a coat of gesso on the interior walls to prep them for painting. The outer walls will be my first experiment with peeling/chipping paint (crackle finish). About 10% of what I wanted to get done this weekend but thats 100% more than I usually seem to get done, lately. Stay tuned! And have a Merry Christmas / Holiday Season / Grumbletime.
Tuesday, December 17, 2013
A Hiatus, and then...
...a burst of activity!
Been a while since my last update. Real Life (tm) took over for a bit, but I have finally guided my focus back to VF. Back to shouting into the void.
Among the haul of buildings I procured at the model railroad show was a small shop - actually two shops in one building - from K-Line.
Its a nice little pair of shops just waiting to be reworked into a reminder of what civilization used to be like. Soon, they will become any number of things. As long as those things involve scavenging and hardship and no electricity or email.
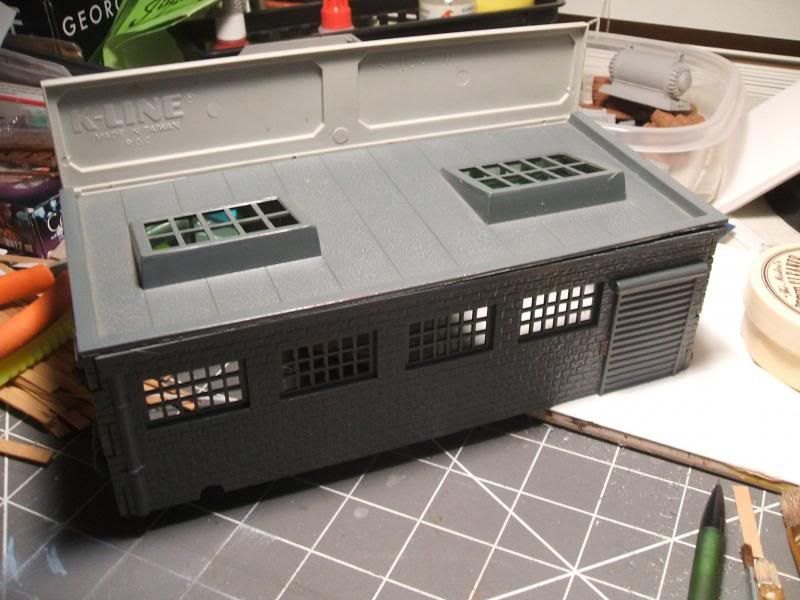
First thing was to get the building structurally ready for gaming. I have to be able to put minis inside the buildings at times so that roof has to come off. Many times with these older model railroad kits they were assembled using unknown cement many decades ago. Often the cement was applied very sparingly and by now has let go, allowing the buildings to come apart with a minimum of effort. Did that happen in this case? No. So out came the hobby saw for a bit of judicious surgery. One of the things I like about this building is that the roof sits in a recess and allows the saw to be inserted into the actual glue joint. As we will see in some future posts not all buildings afford such a luxury.
After carefully (ok, I still managed to gouge a part of the roof detail - arrgghh) sawing the glue joint around three sides of the roof it came off with a minimum of effort. Some of these old kits are a bit brittle so one must be judicious when it comes to prying anything apart.
Some of the details (bushes) are molded into the walls and leave some annoying voids. You can ignore those or do as I did and attempt to cover them up.
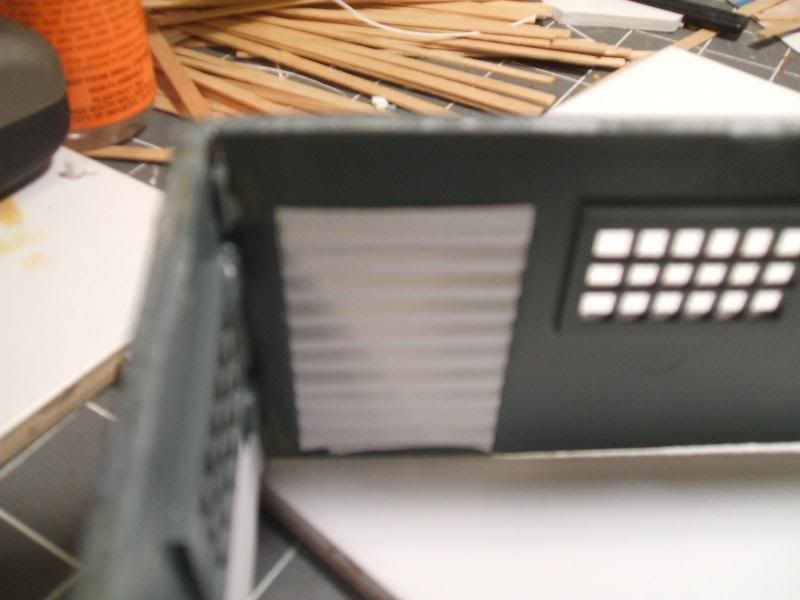
The inside of the roll-up door was a bit bland on the inside so that was covered up with a bit of corrugated card. There was also a small cutout at the bottom of the left rear corner for wiring that was also covered up with a small bit of plain cardstock.
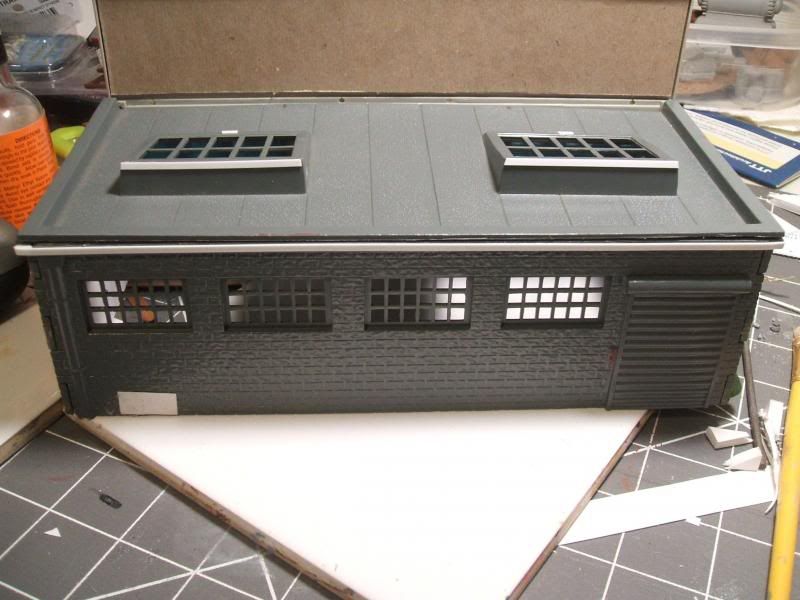
A few other details were added. The back of the sign received a bit of thin cardboard to fill in the largish void (with "K-LINE" in huge relief letters) and the skylight windows got a bit of "hinge" strip and a small "latch". A strip of very thin plastic was added to the rear roof detail to cover some of my ham-handedness with the saw. The front door also got a small bit of plasticard to help define one of the door pulls. Its the little details that make your buildings not look quite so much like the recycled ancient plastic kits that they are!
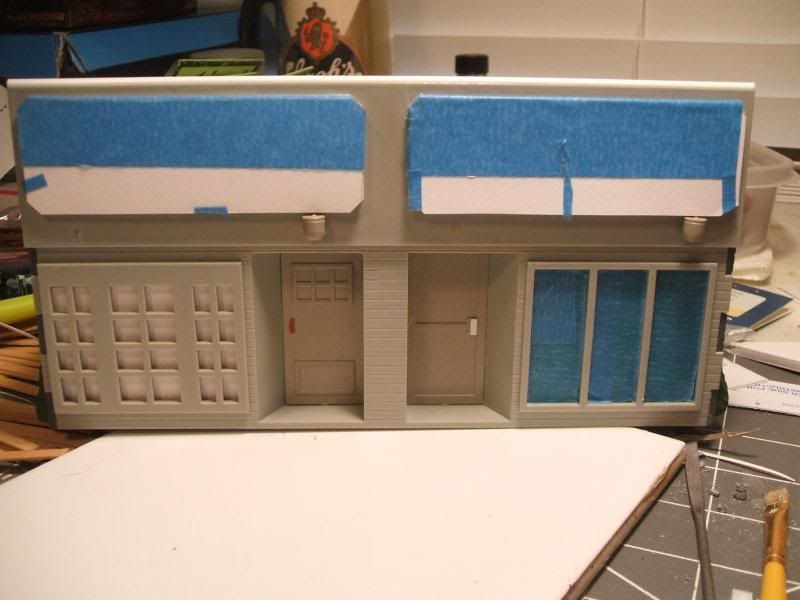
Next up - The Masking of the Red Death. Ok, not that, but masking those funky green windows in the front. I debated trying to take them out but they had the best glue joints on the building. Removing them would have meant prying, cursing, and shattered green plastic. And enough shards remaining to make it tough to replace the windows so they got the tape and card treatment.
I blasted everything with some $1.00 flat black spray paint from my local discount store. Do I have a picture of the primed building? Of course not but you can use your imagination, right? So lets start with the brickwork.

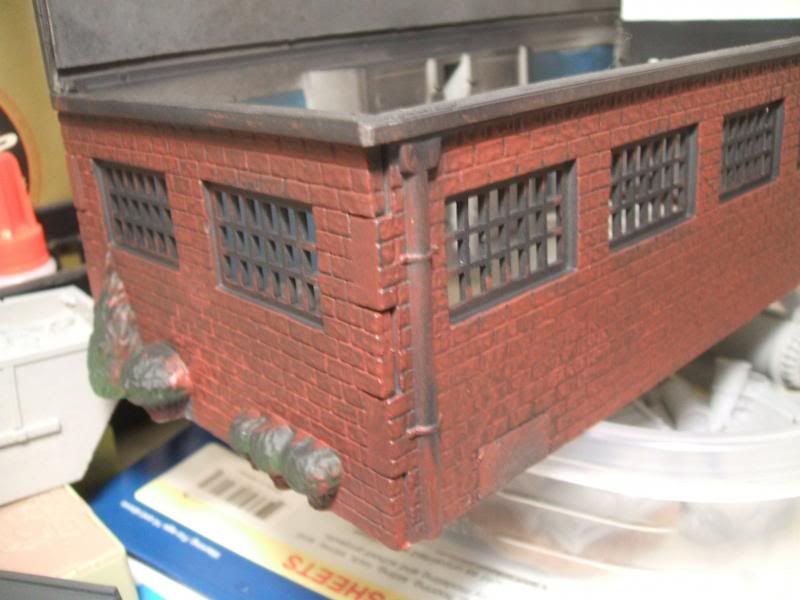
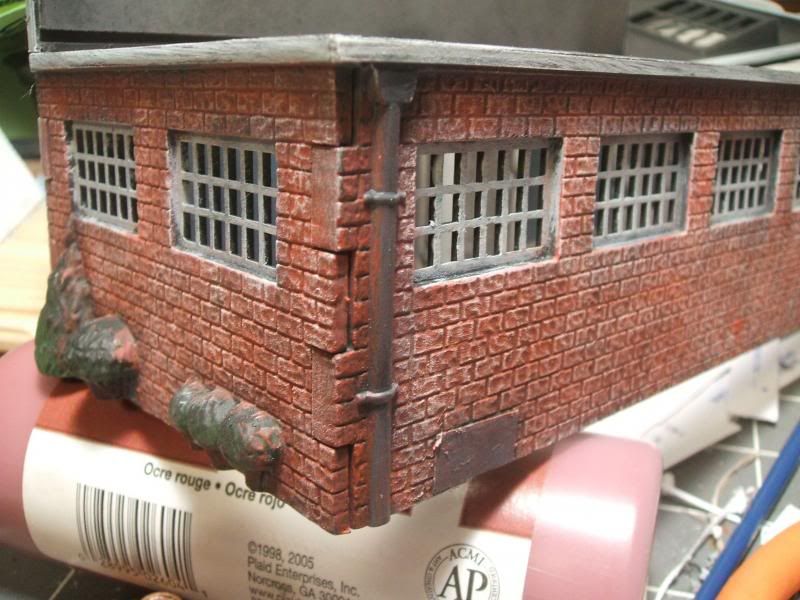
I started with a heavy damp brushing of Apple Barrel #2604 Barn Red. Yes, I use a lot of craft paints. Its what they were made for. Help them fulfill their purpose! It looks a little strange at first but we will fix that.
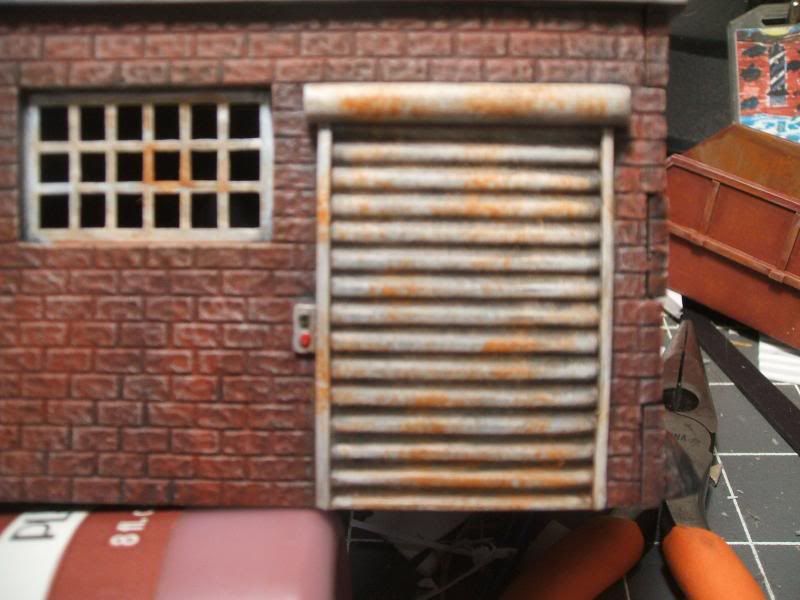
Next I gave it another, lighter damp brush with Delta Ceramcoat Red Oxide. This brings out more of the "brick red" colour we associate with, well, bricks. Then when thats dry, a drybush of light grey (in this case Delta Ceramcoat Quaker Grey. Dont use Quacker Grey or it will look like a duck. But I digress.) I also gave the windows and roll up door a coat of grey. Starting to look more like a building now.
The windows and doors were then given a damp brush of pure white followed by a brown Magic Wash and then stippled with some orange (Citadel Foundation Macharius Solar Orange in this case. Hey, I don't always use craft paints) to bring out the rust and neglect of decades without maintenance. The door control buttons were hit with a dab of green and red. They no longer work but they should at least look the part, right?
Next time, we'll look at whats going on in the front of the building. Hopefully it wont take a month.
Been a while since my last update. Real Life (tm) took over for a bit, but I have finally guided my focus back to VF. Back to shouting into the void.
Among the haul of buildings I procured at the model railroad show was a small shop - actually two shops in one building - from K-Line.
| ||
| Oooh, only 22 clicks to make this appear this time! |
 | |
| Fairly basic, but mutants don't mind. |
First thing was to get the building structurally ready for gaming. I have to be able to put minis inside the buildings at times so that roof has to come off. Many times with these older model railroad kits they were assembled using unknown cement many decades ago. Often the cement was applied very sparingly and by now has let go, allowing the buildings to come apart with a minimum of effort. Did that happen in this case? No. So out came the hobby saw for a bit of judicious surgery. One of the things I like about this building is that the roof sits in a recess and allows the saw to be inserted into the actual glue joint. As we will see in some future posts not all buildings afford such a luxury.
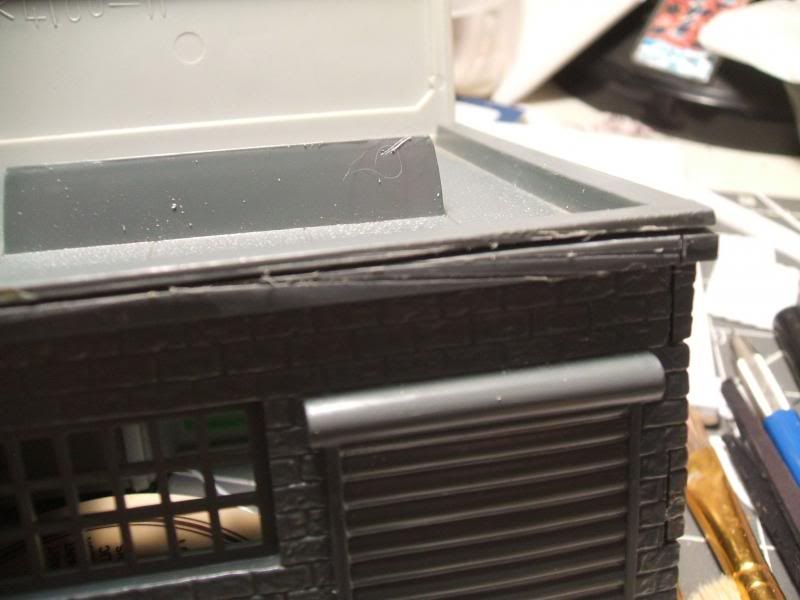 |
| The aftermath of The Saw. A bit sloppy (oops) but it worked. |
After carefully (ok, I still managed to gouge a part of the roof detail - arrgghh) sawing the glue joint around three sides of the roof it came off with a minimum of effort. Some of these old kits are a bit brittle so one must be judicious when it comes to prying anything apart.
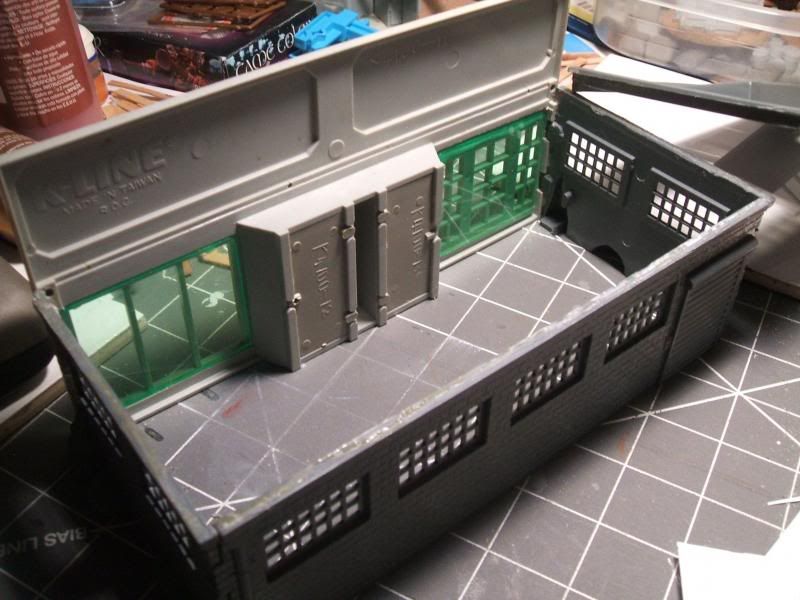 |
| The interior. Indeed basic but its a great starter ruin! |
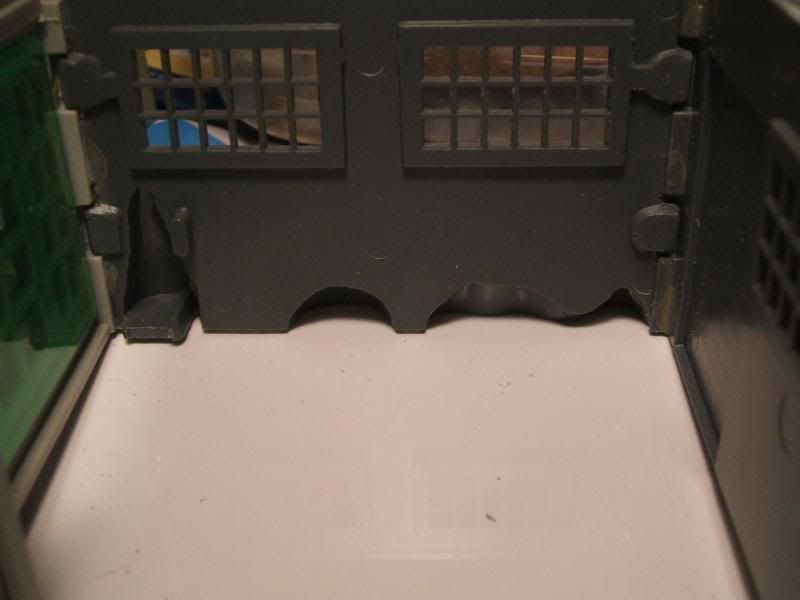 |
| Annoying voids. |
 |
| Even more annoying - not having a decent pic of the covered voids! |
A few other details were added. The back of the sign received a bit of thin cardboard to fill in the largish void (with "K-LINE" in huge relief letters) and the skylight windows got a bit of "hinge" strip and a small "latch". A strip of very thin plastic was added to the rear roof detail to cover some of my ham-handedness with the saw. The front door also got a small bit of plasticard to help define one of the door pulls. Its the little details that make your buildings not look quite so much like the recycled ancient plastic kits that they are!
 |
| It all seems so innocent now... |
Next up - The Masking of the Red Death. Ok, not that, but masking those funky green windows in the front. I debated trying to take them out but they had the best glue joints on the building. Removing them would have meant prying, cursing, and shattered green plastic. And enough shards remaining to make it tough to replace the windows so they got the tape and card treatment.
 | ||
| Coming soon - Bookstore of the Damned! |
I blasted everything with some $1.00 flat black spray paint from my local discount store. Do I have a picture of the primed building? Of course not but you can use your imagination, right? So lets start with the brickwork.
I started with a heavy damp brushing of Apple Barrel #2604 Barn Red. Yes, I use a lot of craft paints. Its what they were made for. Help them fulfill their purpose! It looks a little strange at first but we will fix that.
 |
 |
| Slightly out of focus. Sorry! |
The windows and doors were then given a damp brush of pure white followed by a brown Magic Wash and then stippled with some orange (Citadel Foundation Macharius Solar Orange in this case. Hey, I don't always use craft paints) to bring out the rust and neglect of decades without maintenance. The door control buttons were hit with a dab of green and red. They no longer work but they should at least look the part, right?
Next time, we'll look at whats going on in the front of the building. Hopefully it wont take a month.
Sunday, November 10, 2013
This Town Aint Big Enough...
It really is a bit on the smallish side, so far. One partial house, some garbage skips, and an unbuilt firehouse. And some walls. So yesterday one of my gaming buds and I went to the model train show and procured more buildings.
From some friendly peddlers wares comes this selection of classic Plasticville and K-Line buildings in O scale. I picked up three HO buildings as well but those are for the future. In any case hitting the train shows and looking for used buildings can get you some decent town filler on the cheap. I got all of those pictured for $50. Yes, they are missing some bits. Some need to be carefully cut apart at the glue seams (though some just come apart with a bit of gentle persuasion). They all need to be rebuilt and painted to make them suitable for gaming. But this is a selection of buildings I do not have to design, cut out, and assemble from scratch. I love to scratchbuild things but sometimes you need a bit of help. Ancient plastic model railroad buildings to the rescue!
If you have never been to a model train show, do yourself a favor and go. Its pretty much like going to a gaming con except with (obviously) trains. You'll see some great layouts and there are vendors with new and used stuff. Everyone we spoke to there was friendly and helpful, even once we explained that no, we aren't really train people and yes we play with army men. Maybe it was the idea that they had an equally crazy but more socially accepted hobby than we do that caused them to not be alarmed by us. Its probably not often that the train nutters get to roll their eyes and say "Oh, check out those guys". Always happy to do our part!
Seriously, when you go, take the time to talk to the guys who build the really pretty layouts and likely you'll pick up some good techniques and tips. We stopped to talk to a gentleman who had some absolutely beautiful HO scale buildings for sale - some just buildings, some little vignettes that would look at home in a museum diorama - and he explained a technique of using alcohol and bit of acrylic paint as a stain. He said it works best on real wood but can do well on other surfaces. His results were impressive so guess what I'll be experimenting with when it comes time to paint some of the new construction in VF?
Some of these buildings were like old friends, despite my never having owned them before. They are featured in a series of articles over at http://combatzonechronicles.net/table.htm . That is one of the sources of inspiration I have used in my approach to creating Valhalla Falls. Well worth a peek if you haven't already surfed over.
Another thing we saw at the show was a series of prepainted and detailed buildings that looked great. Definitely a cut above the previous generation of useful "pre-built/pre-painted" model railroad buildings that have been on the market. They had a price tag to match but they were indeed on a different level. Now, am I going to pay $150 for even a largish O scale building so that I can cut it open and make it ready for gaming? When I win the lottery, but probably not before. But they were impressive. I tried not to think about the fact that they may have been built and painted by political prisoners in a gulag somewhere. My buildings are built and painted in my own personal one-man gulag, so definitely far more green and sustainable and whatnot.
The short version - go to the train show, young man.
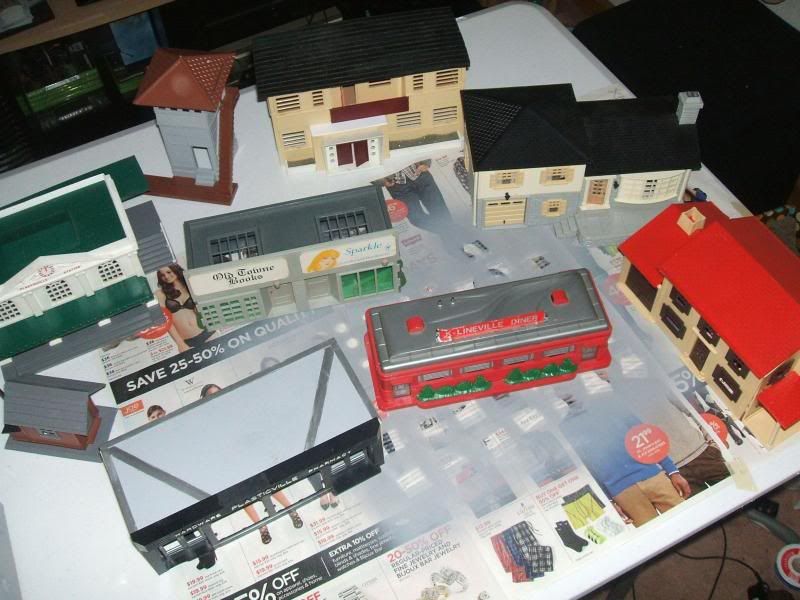 |
| Twentythree clicks later, the pic appears! Plus I finally learned how to do captions. |
If you have never been to a model train show, do yourself a favor and go. Its pretty much like going to a gaming con except with (obviously) trains. You'll see some great layouts and there are vendors with new and used stuff. Everyone we spoke to there was friendly and helpful, even once we explained that no, we aren't really train people and yes we play with army men. Maybe it was the idea that they had an equally crazy but more socially accepted hobby than we do that caused them to not be alarmed by us. Its probably not often that the train nutters get to roll their eyes and say "Oh, check out those guys". Always happy to do our part!
Seriously, when you go, take the time to talk to the guys who build the really pretty layouts and likely you'll pick up some good techniques and tips. We stopped to talk to a gentleman who had some absolutely beautiful HO scale buildings for sale - some just buildings, some little vignettes that would look at home in a museum diorama - and he explained a technique of using alcohol and bit of acrylic paint as a stain. He said it works best on real wood but can do well on other surfaces. His results were impressive so guess what I'll be experimenting with when it comes time to paint some of the new construction in VF?
Some of these buildings were like old friends, despite my never having owned them before. They are featured in a series of articles over at http://combatzonechronicles.net/table.htm . That is one of the sources of inspiration I have used in my approach to creating Valhalla Falls. Well worth a peek if you haven't already surfed over.
Another thing we saw at the show was a series of prepainted and detailed buildings that looked great. Definitely a cut above the previous generation of useful "pre-built/pre-painted" model railroad buildings that have been on the market. They had a price tag to match but they were indeed on a different level. Now, am I going to pay $150 for even a largish O scale building so that I can cut it open and make it ready for gaming? When I win the lottery, but probably not before. But they were impressive. I tried not to think about the fact that they may have been built and painted by political prisoners in a gulag somewhere. My buildings are built and painted in my own personal one-man gulag, so definitely far more green and sustainable and whatnot.
The short version - go to the train show, young man.
Friday, November 1, 2013
Welcome to Garbagetown...
Life has intervened to keep me from working much on anything VF related, but I have managed to get a few bits done over the last week or so.

Above - A bucket of resin goodness. Various items I picked up at a con from the fine gents at Recreational Conflict.

The first of the garbage skips. (As an aside - what is it that causes blogger to sometimes post a pic on the first attempt and then for the next it takes 23 clicks without result?)

Just noticed that some giant kitty left behind some random fuzz. Keeping them off the painting table is a pleasant dream, sort of like "What would I do if I won the Powerball?". Its about as likely. Pests :-)
More to come, soon, I hope.
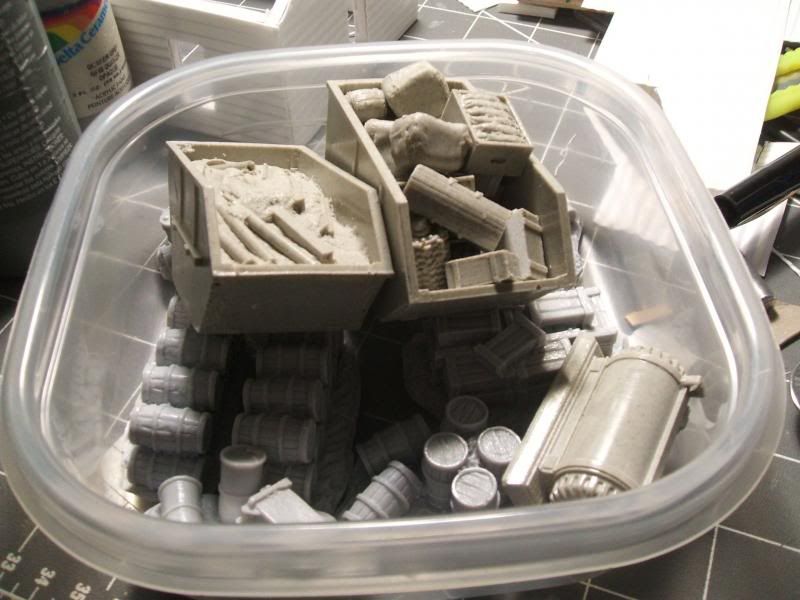
Above - A bucket of resin goodness. Various items I picked up at a con from the fine gents at Recreational Conflict.
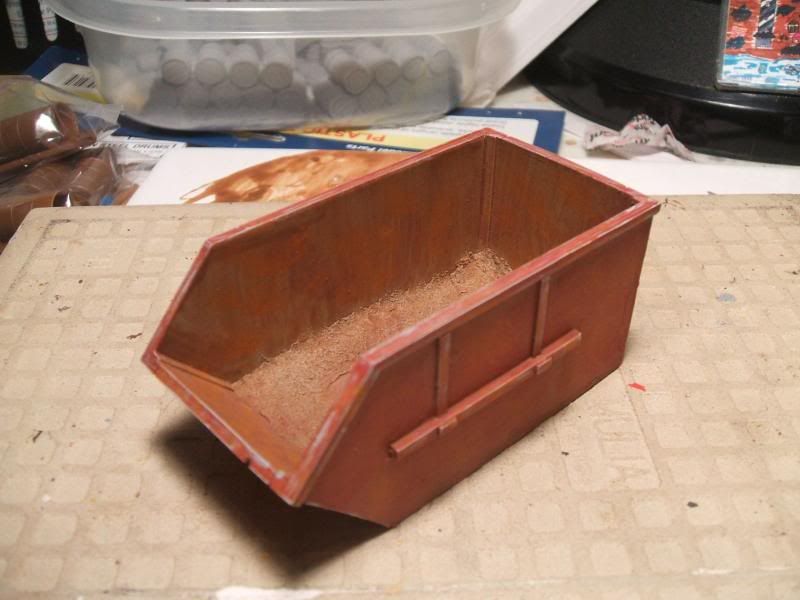
The first of the garbage skips. (As an aside - what is it that causes blogger to sometimes post a pic on the first attempt and then for the next it takes 23 clicks without result?)
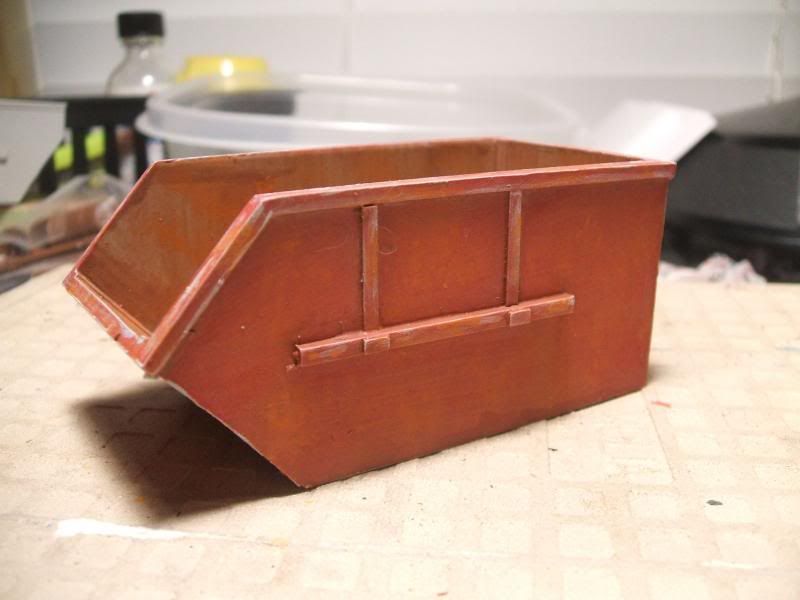
Just noticed that some giant kitty left behind some random fuzz. Keeping them off the painting table is a pleasant dream, sort of like "What would I do if I won the Powerball?". Its about as likely. Pests :-)
More to come, soon, I hope.
Subscribe to:
Posts (Atom)